VS Code
VS Code 的配置和使用指南。
安装
- 打开浏览器,访问 VSCode 官方下载页面
- 点击页面中的 "Download for macOS" 按钮。
- 下载完成后,你将获得一个
.zip文件。 - 双击
.zip文件进行解压,你会得到一个Visual Studio Code.app应用程序。 - 将
Visual Studio Code.app拖动到 Applications 文件夹中,这样你就可以从应用程序目录运行它。
在提取后删除远程分支
删除操作会删除不再存在于远程库上的远程跟踪分支,有助于将分支列表保持干净和最新,对应于 git fetch --prune。
- 打开 VS Code 的设置,搜索
git prune。 - 启用“提取时修剪”选项。

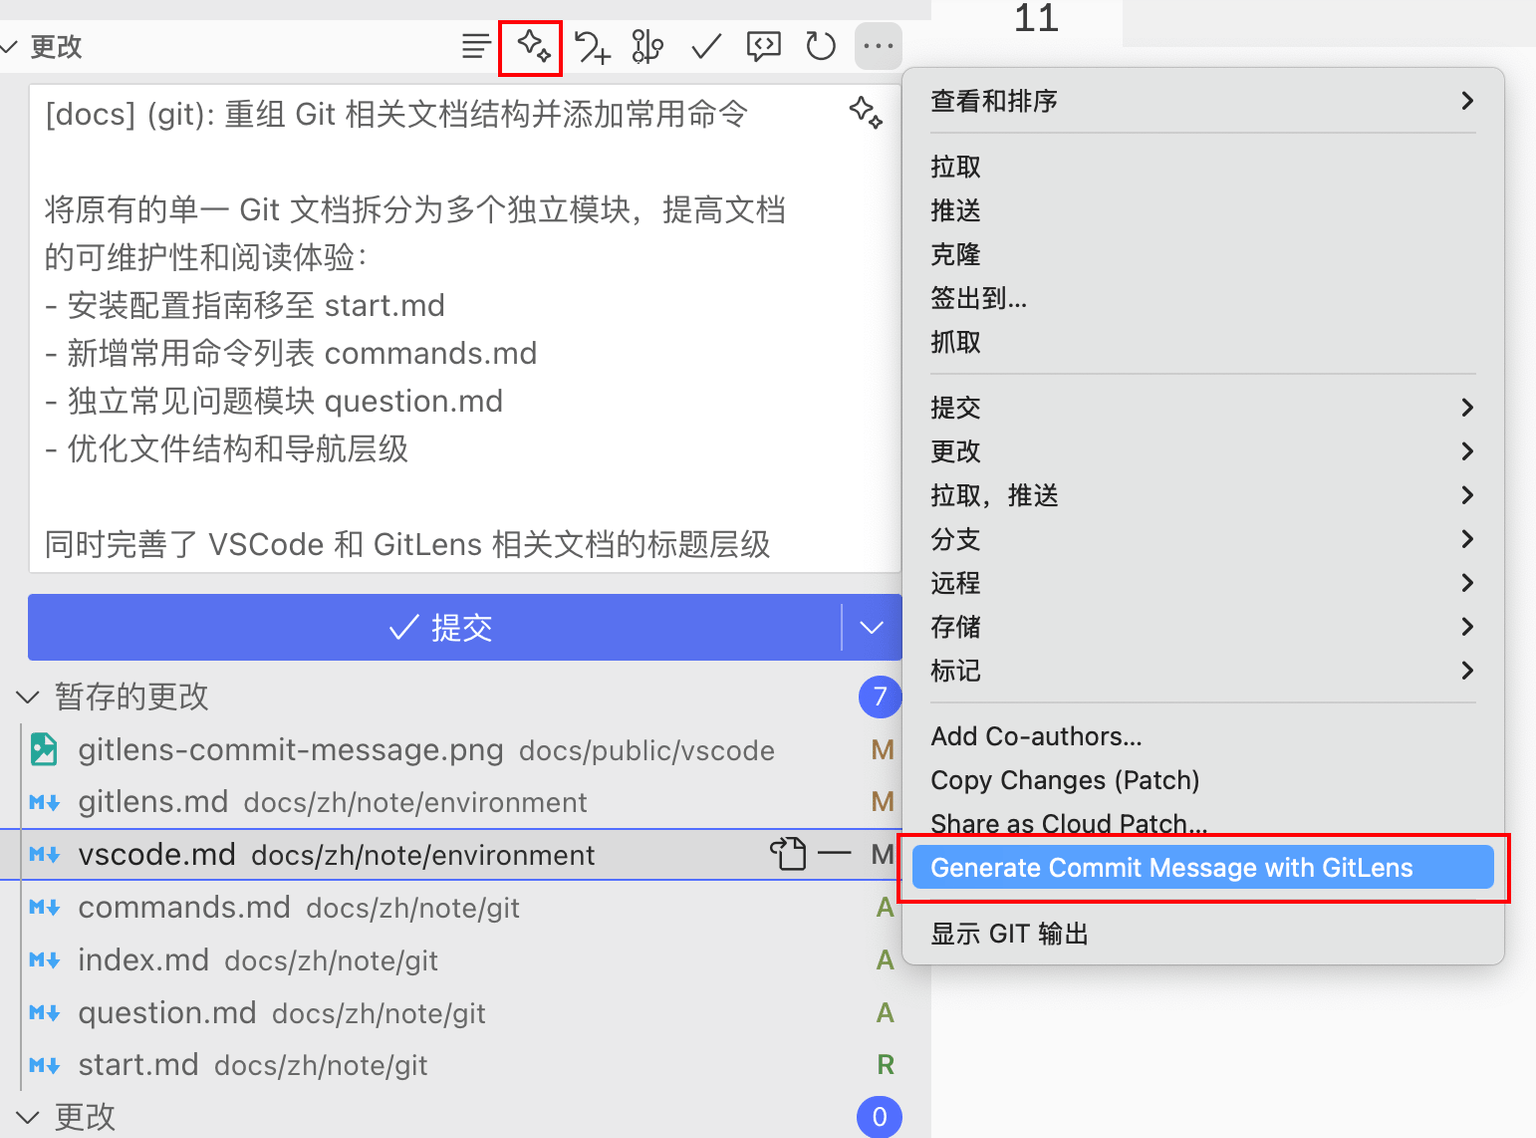
GitLens 提交消息自定义指令
在 VS Code 的 settings.json 文件中添加 gitlens.ai.generateCommitMessage.customInstructions 配置项:
settings.json
{
  "gitlens.ai.generateCommitMessage.customInstructions": "Generate a Conventional Commit message. The commit type (e.g., feat, fix, chore) and any optional scope can be in English, but the main description of the commit must be written in Chinese."
}
使用方法
- 完成代码修改后,在 GitLens 面板中选择 "Generate Commit Message with GitLens"
- AI 将根据自定义模板生成符合规范的提交消息
- 根据需要微调生成的消息内容
- 提交代码
使用 VSCode 打开
为了能够在终端中使用 code 命令来快速打开文件和文件夹,你可以安装 code 命令行工具:
打开 VSCode,按 Cmd + Shift + P,然后输入 Shell Command: Install 'code' command in PATH,选择该选项并执行。
安装完成后,你可以在终端中运行 code 命令。例如:
sh
# 打开当前目录
code .
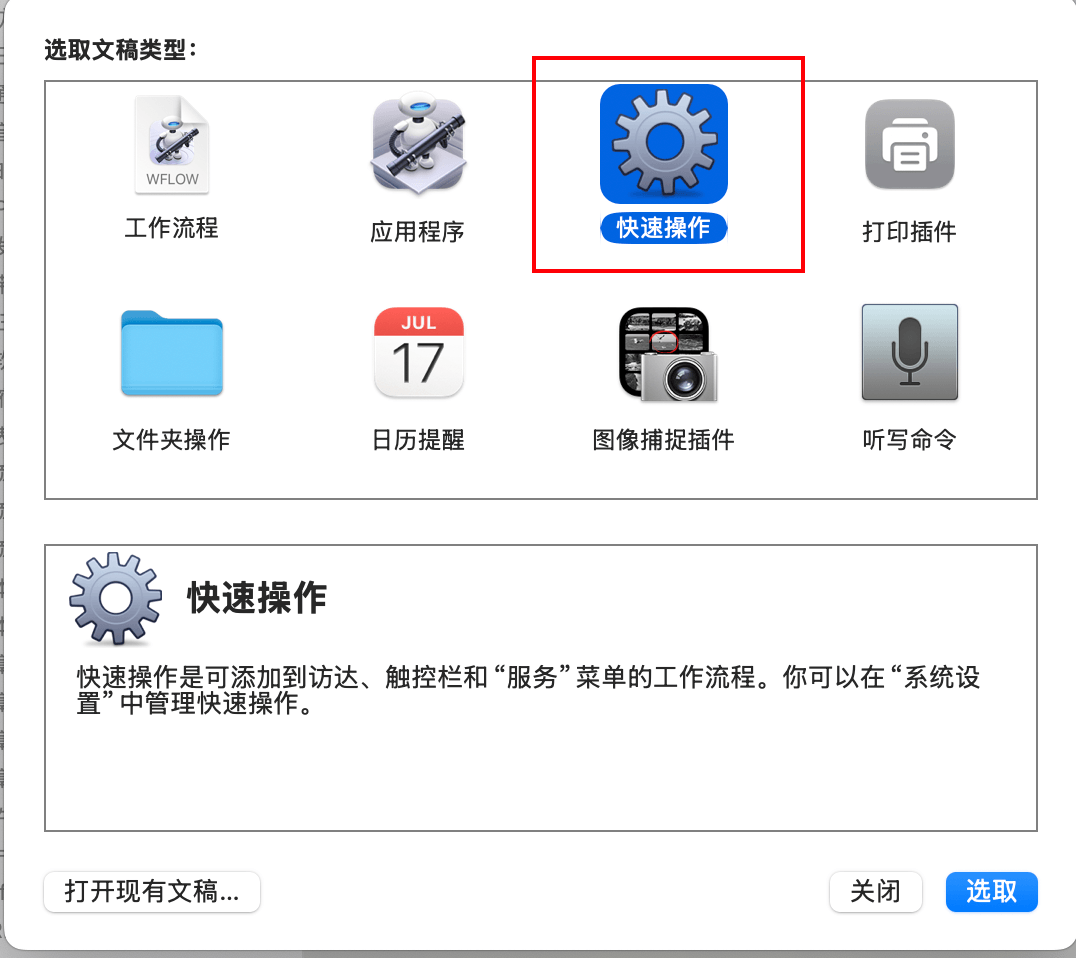
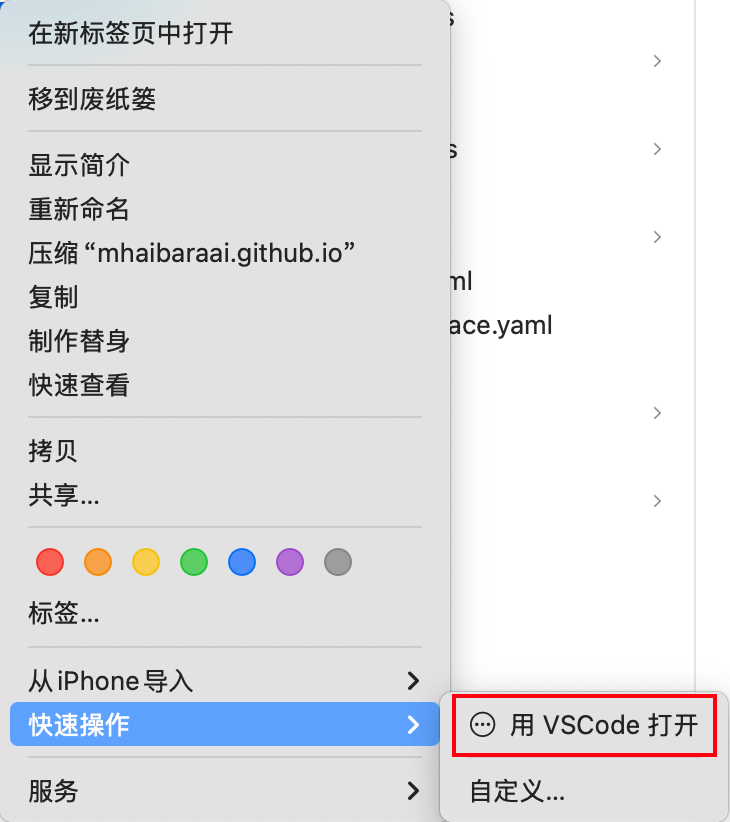
添加 "使用 VSCode 打开" 的右键菜单选项
- 打开 Automator 应用程序
- 你可以通过 Spotlight 搜索
Automator打开它
- 你可以通过 Spotlight 搜索
- 选择 "快速操作" 类型
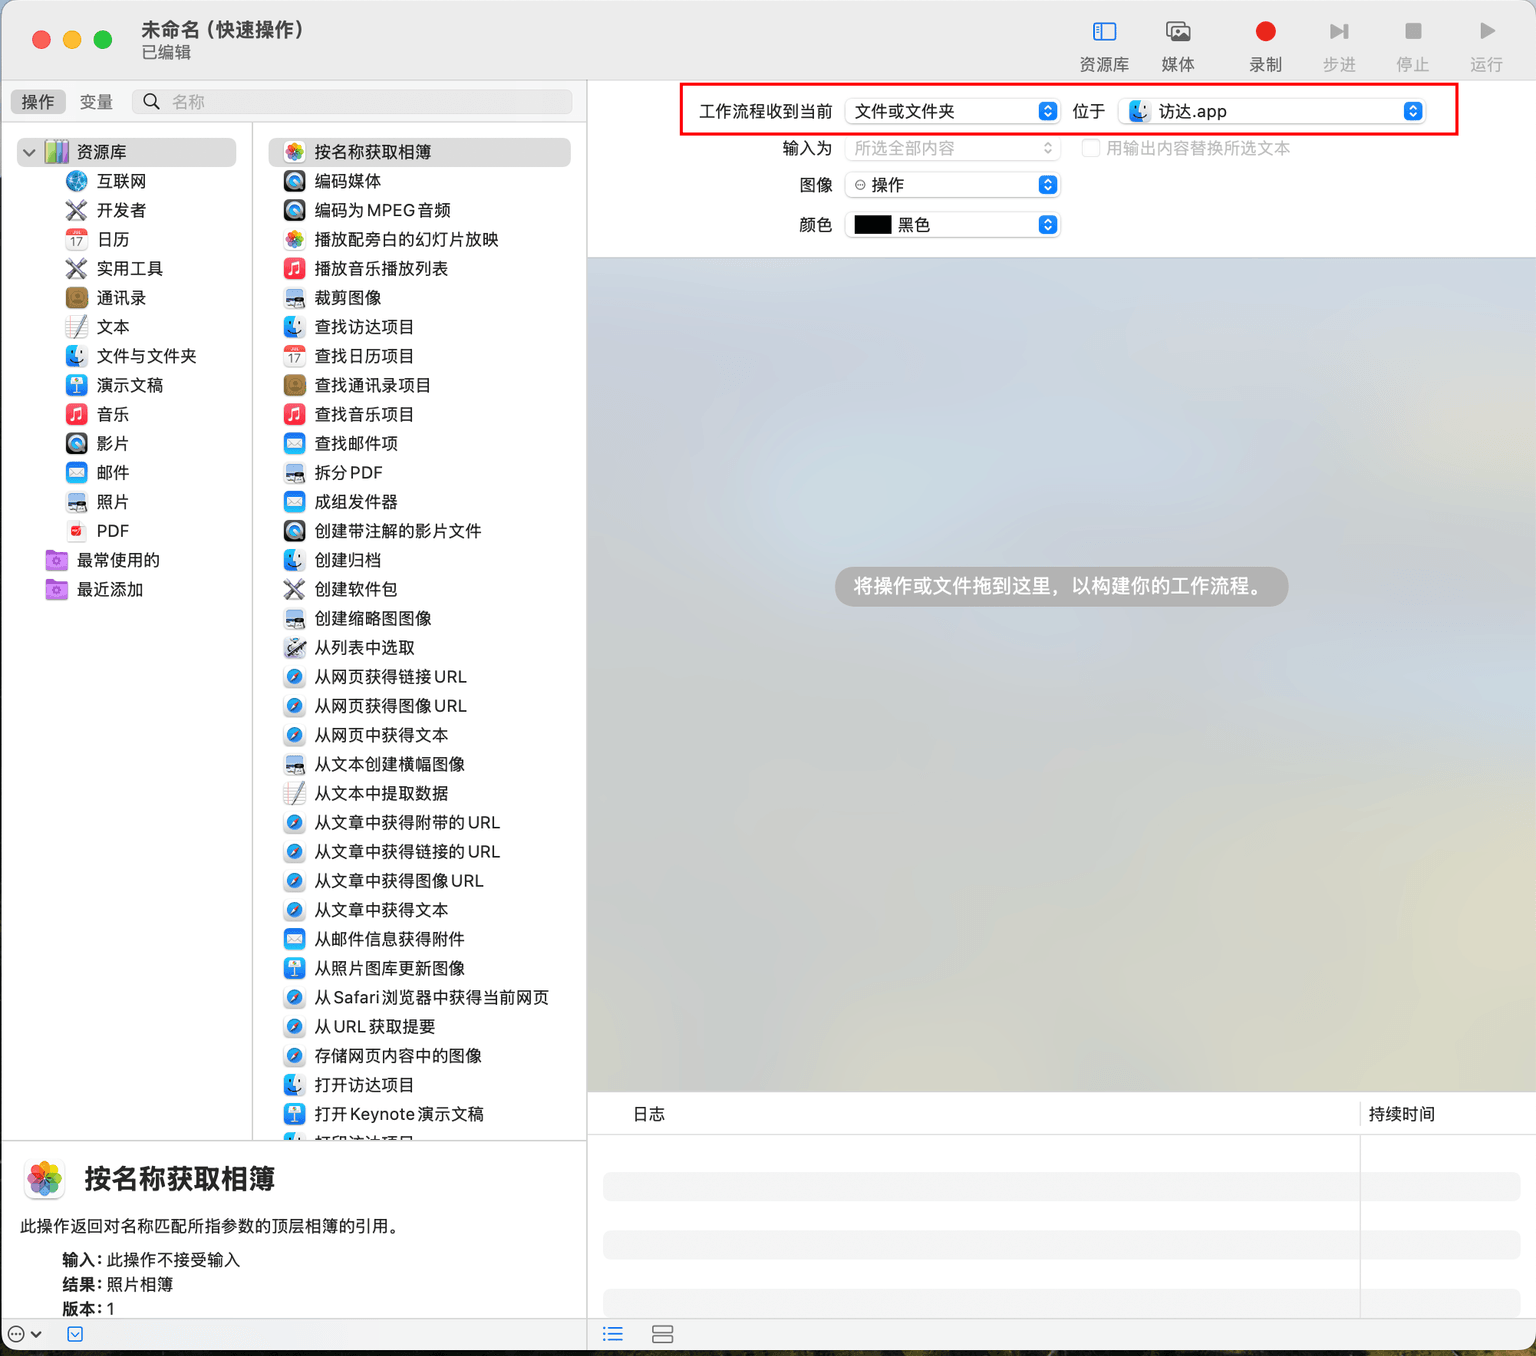
- 配置服务
- 在窗口顶部,将 “工作流程收到当前” 更改为 “文件或文件夹”
- 将 “位于” 设置为 “访达.app”
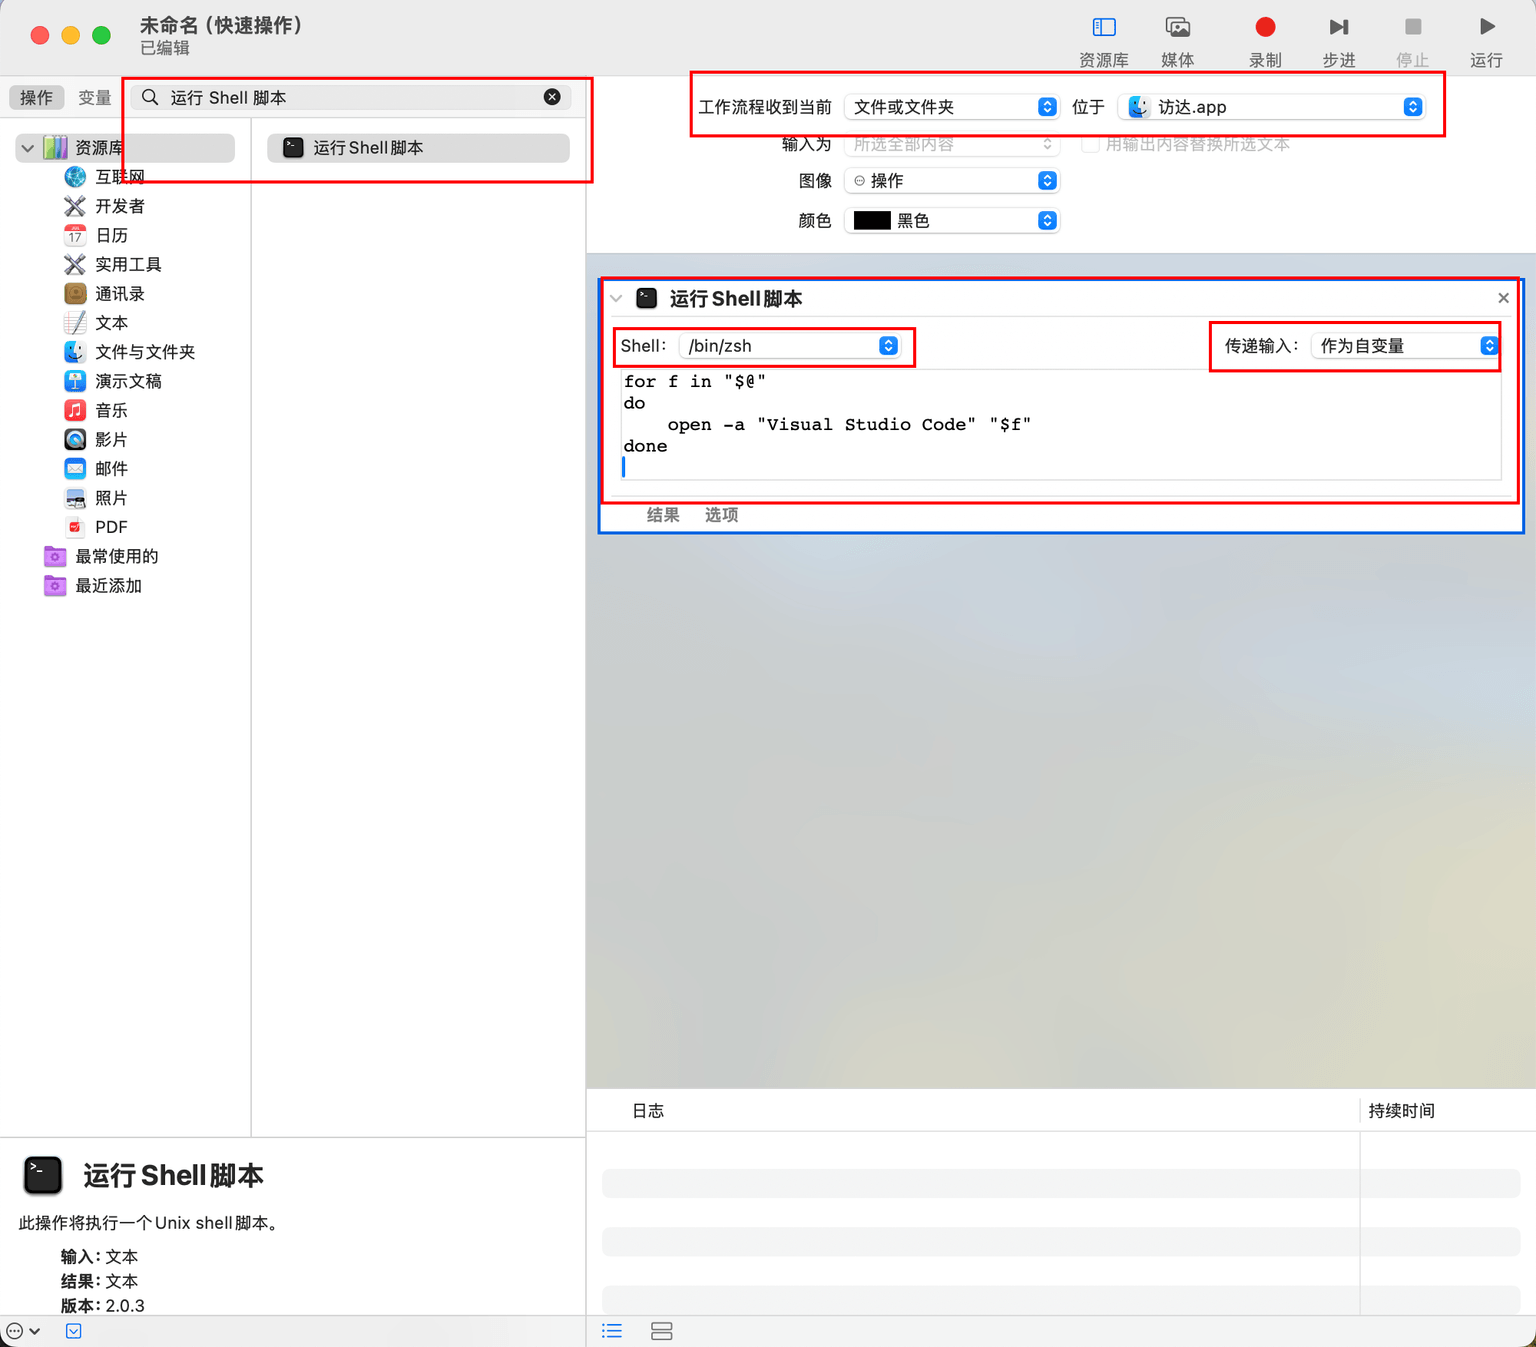
- 添加 VSCode 动作:
- 在左侧搜索框中输入
运行 Shell 脚本,将其拖动到右侧的工作区 - 在
Shell下拉菜单中选择/bin/zsh - 在
传递输入下拉菜单中选择作为自变量 - 在脚本框中输入以下内容:sh
for f in "$@"
do
    open -a "Visual Studio Code" "$f"
done
- 在左侧搜索框中输入
- 保存服务
- 点击左上角的保存按钮,输入服务名称,例如
使用 VSCode 打开
- 点击左上角的保存按钮,输入服务名称,例如
- 使用服务
- 在 Finder 中,右键单击文件或文件夹,选择
服务->使用 VSCode 打开
- 在 Finder 中,右键单击文件或文件夹,选择